Week two is over, and I’m sad that I only have a week left. I really wish this teacher would teach the class during the Fall and Spring semesters, but unfortunately it is someone else…
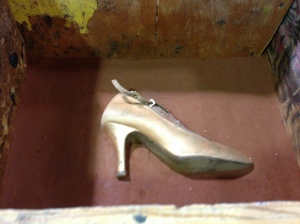
On Monday, after a few more hours of playing with the foam, I finally got some ideas down for the pieces. We also talked about some piece mold ideas. A piece mold is where to take an object (found or made) and create a mold for it, and the mold ends up being at least two separate pieces. It can be more depending on how complex the pattern is. The mold is made out of the same resin bonded sand that we put our wax patterns in, but we do not put these molds in the oven. That step is only used to melt out the wax. I decided on Monday to use one of my first pairs of dancing shoes for the piece mold. We also took out our wax molds from the oven and prepped them for the pour.
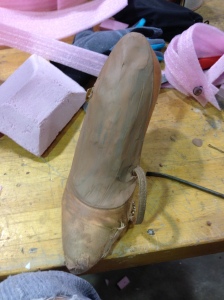
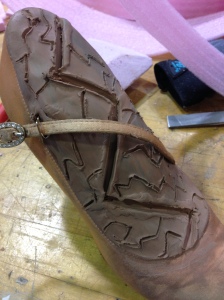
On Tuesday I brought in my shoe to start work on the piece mold. First, I had to fill the shoe with plasticine, which is a type of clay that never dries. After I filled the shoe I put in a crackle pattern in the plasticine. I chose this pattern to mimic the pain that the feet go through during dancing. We dance in these shoes, which have heel heights ranging 2-3 and sometimes even 3 1/2 inches, for at 2 hours a day for a total of 13 hours a week. That’s a lot of dancing for those feet! After packing and creating the design, I had to create a false bottom around the shoe in order to make a two part mold. Because the shoe comes off the table in some areas, we could not just create a resin sand mold without the bottom. To create the false bottom, we use this stuff called petrobond. Petrobond is a type of sand that is mixed with clay. This mixture is sticky and the user is able to work it around the mold so that no resin sand will fall to the table. I spent most to Tuesday with the petrobond–as it is a slow and tedious process.
On Wednesday I was finally able to fill my mold for my piece mold. We mixed up some sand and packed in the first half of the mold. The mold took most of the day to try, so we were unable to do the second half on Wednesday. With the extra sand, since we have to mix sand in batches of 50lbs or 100lbs, I was able to fill a scratch mold. A scratch mold is what it sounds like, a cube-ish box of resin bonded sand that has a concave center where you scratch a design into the sand. The concave center allows you to pour metal without loosing too much metal. I have no idea what I’m going to be doing with the scratch mold yet, but that’s for next week.
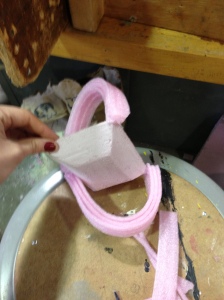
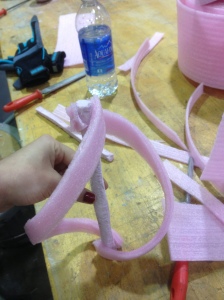
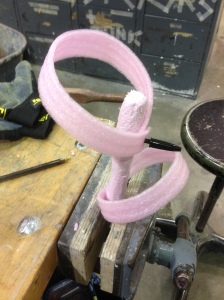
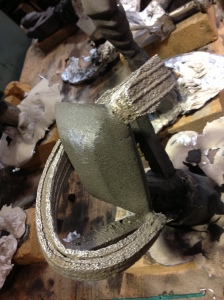
Also on Wednesday, I solidified my for my foam piece. I took the advice from my professor, Steve, and worked on creating a more angular core with the swirly pieces. The picture for it will also appear below with the rest. I was also to pack this piece on Wednesday. We are using just regular, angular sand–not resin bonded. The process we are using is called the loose sand-lost foam process. This means we are just using sand packed, and as we pour the foam–the metal will evaporate the foam and the metal will take the place of the foam pattern before the sand collapses.
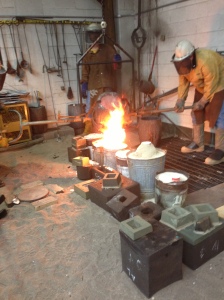
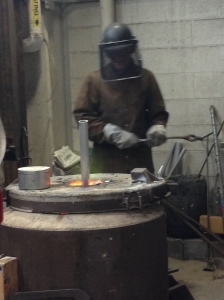
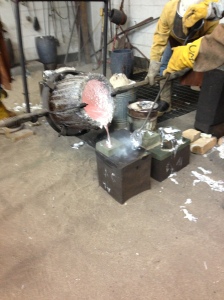
Thursday, we finally got to pour. This is all that we did today, and ended about hours early. It took about an hour to heat the furnace up high enough to get the aluminum, the first metal we poured, hot enough to melt and pour into the molds. The melting temperature is about 1100 degrees and we poured the metal at about 1500 degrees F! The heat was incredible. We were dressed in leather coats in order to protect clothes incase the worse would happen and fire broke out–luckily that didn’t happen today. As we waited for the aluminum to melt down, we took all the molds that were to be cast in aluminum and placed them by the furnace on the “beach.” The beach is where the furnace is located and is full of sand. The sand protects to concret from spills of molten metal. If the metal were to fall on the concret during the pour, the concret would crack and pop because of the difference in temperature. Once the molds were placed on the beach, and the metal was melted down, we were ready to pour!
It takes five active players to make the operation of pouring the metal work. There is the director, our teacher in this case, that directs the flow of all the workers helping out with the pour. Then there is the door opener, this person opens the top of the furnace so that the crucible, the canister that holds the molten metal, can be lifted out. The door is then closed and the opener leaves the beach. There is the crane operator, who handles the bottons that move the yolk and crucible holders up and down. Then there are two people operating the crucible through the yolk and holders. These two handle the actual pouring of the metal. It truly is like a choreographed dance. I wish I had gotten video of it, but Steve requested we did not.
All the aluminum pieces came out great! None of the molds broke while we poured and everything cooled beautifully. The only thing we have to do now with these pieces is remove the sprues, vents and any other excess metal, and shine up the pieces!
We had some time between pours because the bronze needed to be heated to 1800 degrees to metal, and 2000 to pour. We cleaned up a bit during our down time. Once the bronze was heated up to the right temp, we got back to work on the next pour. We set up all the molds for bronze and were assigned jobs. This time I played an active role. It got to open and close the door as they lifted the molten hot crucible out of the furnace. That was such a rush! The heat was just insane. It didn’t matter that I had all this protective gear (face shield, eye protection, leather coat and apron), the heat was just radiating from the metal and bouncing off the walls. After I was opened the door, I had to clear the area, in case anything happened while they were lifting the crucible out. After the crucible was safely lifted from the furnace, I was instructed to go back in and close the furnace. My face was shielded so I didn’t feel as much of the heat. However, my ear was not covered and it felt the full brunt of the heat coming off of the bronze. And holy moly that was hot. I closed the door and made my way back to the edge of the beach to watch the pour.
All I can say is that if you ever get the chance to go watch a metal casting, DO IT! It is truly something is amazing to watch and be a part of!
Related articles
- First Week of Class (picturelinephotography.wordpress.com)
- Defect of Sanding Casting (machinemakers.typepad.com)
- Aluminum Pouring with Jardin Foundry at First City Art Center of Pensacola, Fl. (ireport.cnn.com)
